I was given some Rowan Cashsoft DK in Sweet (that really is the colour name) and decided to make a Liesel scarf for a friend.
 
When I swatched, I liked the shape of the start, which forms a nice curve, but not the ending, so I decided to knit the scarf as two halves and graft them together.

The grafted section does not like quite as good as I hoped, but I think it is OK. I considered stopping each half 2 rows before the end of the pattern repeat to make that section shorter, but that would cause problems with the purled centres of the leaves.
I used 4.5mm needles, and the scarf took 132g (375 yds). The scarf was blocked to 7.25″ wide and 77″ long, but shrunk to 6.5″ by 72″ once unpinned and allowed to relax. Even though my friend likes long scarves, I thought that was plenty long enough, but I still had some yarn left, so I decided to make some fingerless mitts to match. I knitted them ‘top down’ to use that nice curved edge over the back of the back of the knuckles. I did them on 4.00mm Brittany dpns, as I thought they needed a firmer gauge.

My friend’s hands are smaller than mine so they should fit her a little better.without the cuff creeping over the base of the hand. I did the thumb gusset slightly towards the palm – you can see the shaping better on this picture, which also shows that the ‘straight across’ top on the palm side doesn’t interfere with bending the hand, while the curved top on the back gives a bit more protection to the fingers. They only took 30g (85 yds) of yarn for the pair.

And here is a picture of my friend wearing them:

Just a quick entry to say that I have updated my sock page. Some friends were discussing socks and sharing pictures and I found some old pictures that I didn’t have online, so I added them to the end of the page, with brief descriptions.
As for current craft work, I finally dug out my Icarus-in-progress, after putting it aside for Christmas and other gift knitting, and I’m still knitting the Opal socks for myself … more on those later.
Anne Dixon visited our guild this weekend – a very entertaining and informative talk yesterday which focussed on the history of inkle weaving, then a workshop today. One of the great things about going to follow-up workshops is that you get a chance to look at the tutor’s samples in much more detail than after the talk. Another is the chance to work alongside friends, swapping ideas and having fun though working hard. A bonus this time was that Anne is a friend too, through the Braid Society and through other workshops at which she was a fellow student.
Today we were given a choice of 2 warping plans. I chose what she calls Baltic-style pickup, a technique used all around the Baltic Sea – Scandinavia, Latvia and so on. I’d already pretty much decided to choose that one, but seeing her samples yesterday confirmed I’d made the right choice as I loved her Baltic designs.Â
 I warped up my Ashford mini-inkle loom last night using 3 colours of #8 pearl cotton. (The third colour was white - you can just see a line of it on each side separating the borders from the main pattern area.)
 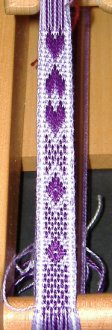
 Yes, that tiny sample is all I have to show from a 6-hour workshop, but I am still very pleased with it. I wove enough to convince myself that I now understand the technique, and that is what I needed to do today. I spent a lot of the time there watching Anne demonstrate other techniques on the other warping plan, but I couldn’t try any of those on this warp. I also spent a long time looking at her samples, and making notes of things I want to try later. Overall, a very enjoyable day!
My last entry showed a replaced toe and a patched heel. On the other pair of Fortissima socks, there were larger thin areas on the heels so instead of duplicate stitching to strengthen them I decided to cut the affected areas right out and replace them. As there was interest in the earlier post, I thought I’d show this process here. It looks complicated, but as long as you are comfortable grafting two rows together, it is easier than it looks.
[Note: these socks were knitted toe-up, so the gusset stitches were on needles and as I knit back and forth across the flap, I ‘ate up’ one gusset stitch at each turn, using ssk and p2tog. This makes it easy to reknit the heel flap. For top-down socks with the gusset stitches picked up from the side of the heel flap, it isn’t quite as simple. If I were repairing that type of heel, I would probably cut the whole heel out, including the shaping at the bottom, repair as shown here but starting at the top of the flap, continue with the original heel shaping and graft across the bottom of the heel.]
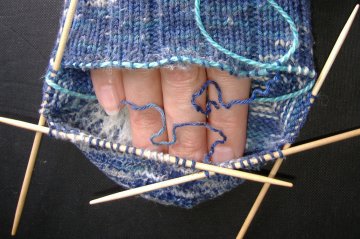
So, the first (and possibly most difficult) step is to snip the yarn a few rows away from one edge of the area to be repaired and start unpicking the yarn. It may be quite felted, so be careful. When you get to the edge, store the freed gusset stitch on a dpn or waste yarn. Continue doing this till you have only one row to go, then carefully tink the stitches one by one, putting them onto another dpn or piece of waste yarn. As you cut off the reclaimed yarn, remember to leave a long enough end to sew in later. The repair is slightly easier if you start and end at an edge, but I find that makes it bulkier where the ends are sewn in so I prefer to stop the unpicking mid-row. Repeat the process in the opposite direction.
 Â
Â
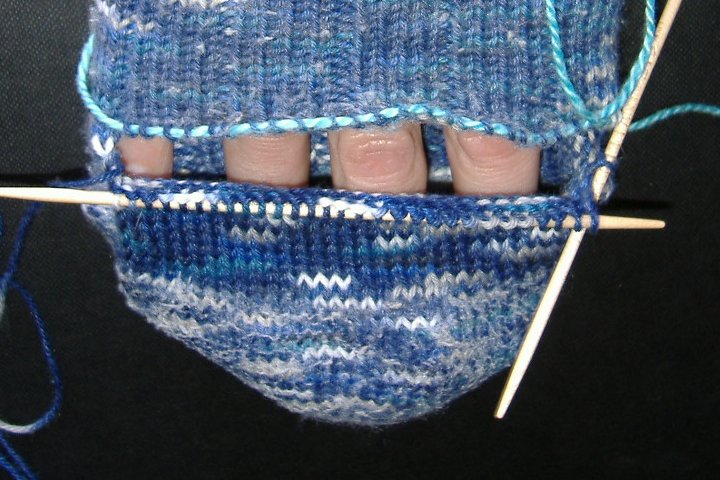
You now have a sock with a big hole, but no loose stitches. I have left the top edge of the hole on waste yarn as I find it gets in the way less that way. The next task is to knit the missing part of the flap, ending one row early ready for grafting.
 Â
Â
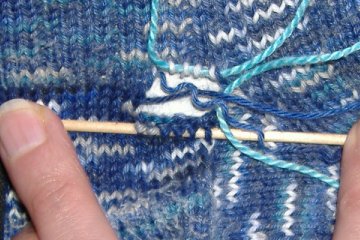
Note the gusset stitch still on a needle (later replaced by waste yarn as the needle fell out) at the right of the picture. The last stitch on the left side has already been used up. The new stitch that did that is the slipped edge stitch, which needs to be linked to the row above. Pull the free end out of the stitch below, and use it to graft to the slipped stitch on the row above, then back into its original stitch. Now you can graft the flap to the row above. If you are starting and stopping at an edge, that’s all you need to do – you can just sew in the ends. If you are starting and stopping in the middle of a row, you will get to a point where thre are two missing rows, not just one, so you have to stop grafting.
 Â
Â
After completing the last full stitch on the bottom row, use the yarn end to continue knitting (or in my case purling) across the row, turn as you did at the other side and then graft back to fill the remaining gap. Sew in the ends and you now have a fully repaired heel.
Now I have a confession to make. When I tried to do the final piece of grafting, I found I was one stitch short at the top. After some close inspection, I realised I had aligned the stitches wrongly at the start of the grafted row. Now any sensible knitter would say “It’s only a heel flap, no-one will see it, so just fudge it to make it work.” I repeat that … NO ONE WILL SEE IT!!!! But I couldn’t do that. I did try to convince myself, really I did, but I ended up grafting across the whole of that second row, unpicking the original yarn ahead of me, till I reached the other side and corrected the mistake, then turned the corner and did a few more stitches so I could join in mid-row again. Yes, I’m crazy!!! But at least I can look at my repaired heel and feel real satisfaction.     Â
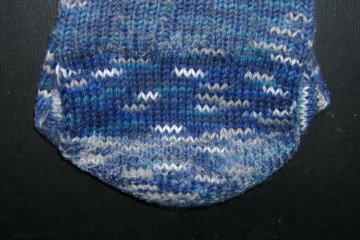
I noticed yeserday that the top of the heel flap of one of my favourite socks had worn very thin, with only the nylon remaining in some places. I checked the other 3 similar socks (I’d knitted 2 identical pairs around the same time) and found 2 of them had the same problem. I also checked the toes and found the two right socks were both badly worn over the top of the big toe nail.Â
I checked my notes and realised they are over 10 years old. That’s not bad for socks which have been worn a lot, but as I said, these are my favourite socks, in Fortissima Cotton Colori, and I wasn’t ready to give up on them yet.
As the nylon was holding the shape of the stitches, I decided to duplicate stitch over the thin area, working from the inside of the flap so it wouldn’t show much on the outside:
 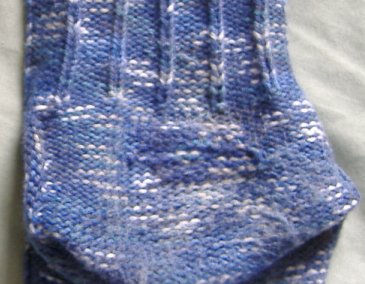
 The patched area felt much thicker than the rest, quite lumpy, so I was afraid it might rub against my heel, but I wore the first sock yesterday when I visited my mother in hospital. That was quite a bit of walking and I couldn’t feel any lumpiness at all, and it will soon flatten out with wear. I’ll do the other thin heel areas over the next few days
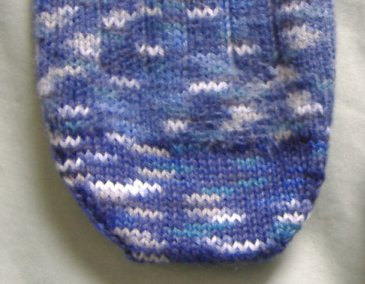
This morning I tackled one of the toes. It seemed easier to reknit the toe than to patch it. I snipped just below the toe shaping, then ripped back to the first non-shaping round, putting the stitches onto dpns as I carefully tinked the final round.  These socks were knitted toe-up, but converting increases to decreases so I could knit the replacement toe top-down was no problem. You can see the change in colour and texture of the yarn at the top of the shaping, but after a few washes the difference won’t show.
Â
-
Failed to fetch badge info from Flickr.\n
-

-

-
