My last entry showed a replaced toe and a patched heel. On the other pair of Fortissima socks, there were larger thin areas on the heels so instead of duplicate stitching to strengthen them I decided to cut the affected areas right out and replace them. As there was interest in the earlier post, I thought I’d show this process here. It looks complicated, but as long as you are comfortable grafting two rows together, it is easier than it looks.
[Note: these socks were knitted toe-up, so the gusset stitches were on needles and as I knit back and forth across the flap, I ‘ate up’ one gusset stitch at each turn, using ssk and p2tog. This makes it easy to reknit the heel flap. For top-down socks with the gusset stitches picked up from the side of the heel flap, it isn’t quite as simple. If I were repairing that type of heel, I would probably cut the whole heel out, including the shaping at the bottom, repair as shown here but starting at the top of the flap, continue with the original heel shaping and graft across the bottom of the heel.]
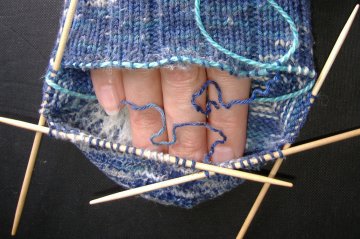
So, the first (and possibly most difficult) step is to snip the yarn a few rows away from one edge of the area to be repaired and start unpicking the yarn. It may be quite felted, so be careful. When you get to the edge, store the freed gusset stitch on a dpn or waste yarn. Continue doing this till you have only one row to go, then carefully tink the stitches one by one, putting them onto another dpn or piece of waste yarn. As you cut off the reclaimed yarn, remember to leave a long enough end to sew in later. The repair is slightly easier if you start and end at an edge, but I find that makes it bulkier where the ends are sewn in so I prefer to stop the unpicking mid-row. Repeat the process in the opposite direction.
 Â
Â
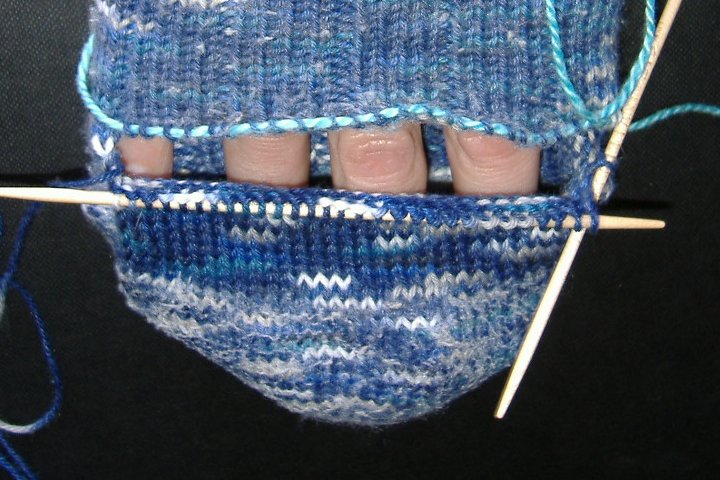
You now have a sock with a big hole, but no loose stitches. I have left the top edge of the hole on waste yarn as I find it gets in the way less that way. The next task is to knit the missing part of the flap, ending one row early ready for grafting.
 Â
Â
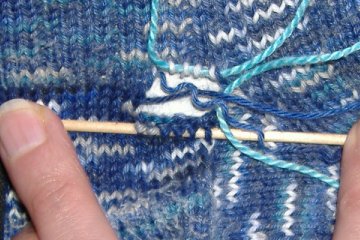
Note the gusset stitch still on a needle (later replaced by waste yarn as the needle fell out) at the right of the picture. The last stitch on the left side has already been used up. The new stitch that did that is the slipped edge stitch, which needs to be linked to the row above. Pull the free end out of the stitch below, and use it to graft to the slipped stitch on the row above, then back into its original stitch. Now you can graft the flap to the row above. If you are starting and stopping at an edge, that’s all you need to do – you can just sew in the ends. If you are starting and stopping in the middle of a row, you will get to a point where thre are two missing rows, not just one, so you have to stop grafting.
 Â
Â
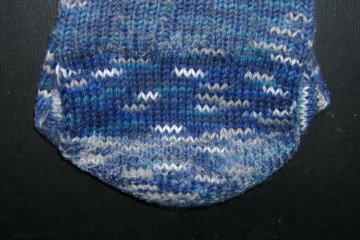
After completing the last full stitch on the bottom row, use the yarn end to continue knitting (or in my case purling) across the row, turn as you did at the other side and then graft back to fill the remaining gap. Sew in the ends and you now have a fully repaired heel.
Now I have a confession to make. When I tried to do the final piece of grafting, I found I was one stitch short at the top. After some close inspection, I realised I had aligned the stitches wrongly at the start of the grafted row. Now any sensible knitter would say “It’s only a heel flap, no-one will see it, so just fudge it to make it work.” I repeat that … NO ONE WILL SEE IT!!!! But I couldn’t do that. I did try to convince myself, really I did, but I ended up grafting across the whole of that second row, unpicking the original yarn ahead of me, till I reached the other side and corrected the mistake, then turned the corner and did a few more stitches so I could join in mid-row again. Yes, I’m crazy!!! But at least I can look at my repaired heel and feel real satisfaction.     Â
I noticed yeserday that the top of the heel flap of one of my favourite socks had worn very thin, with only the nylon remaining in some places. I checked the other 3 similar socks (I’d knitted 2 identical pairs around the same time) and found 2 of them had the same problem. I also checked the toes and found the two right socks were both badly worn over the top of the big toe nail.Â
I checked my notes and realised they are over 10 years old. That’s not bad for socks which have been worn a lot, but as I said, these are my favourite socks, in Fortissima Cotton Colori, and I wasn’t ready to give up on them yet.
As the nylon was holding the shape of the stitches, I decided to duplicate stitch over the thin area, working from the inside of the flap so it wouldn’t show much on the outside:
 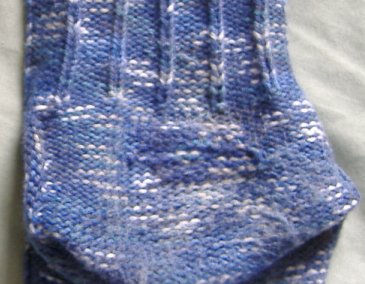
 The patched area felt much thicker than the rest, quite lumpy, so I was afraid it might rub against my heel, but I wore the first sock yesterday when I visited my mother in hospital. That was quite a bit of walking and I couldn’t feel any lumpiness at all, and it will soon flatten out with wear. I’ll do the other thin heel areas over the next few days
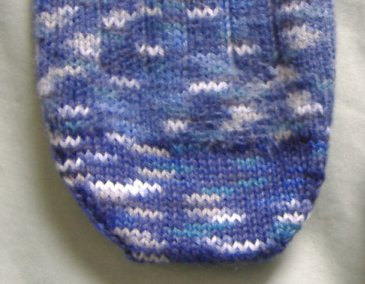
This morning I tackled one of the toes. It seemed easier to reknit the toe than to patch it. I snipped just below the toe shaping, then ripped back to the first non-shaping round, putting the stitches onto dpns as I carefully tinked the final round.  These socks were knitted toe-up, but converting increases to decreases so I could knit the replacement toe top-down was no problem. You can see the change in colour and texture of the yarn at the top of the shaping, but after a few washes the difference won’t show.
Â
[Oh dear, make that "yesterday", as I didn't get this post finished before midnight.]Â
My Secret Santa Sister’s present arrived, and I was persuaded to open it a little early – oh, they had to struggle as I resisted bravely. [You do believe me, don't you?]
 First there was the big box …
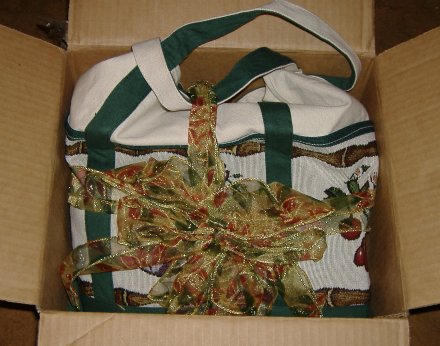
… then inside it, there was a huge tote bag tied with pretty glittery ribbon ..
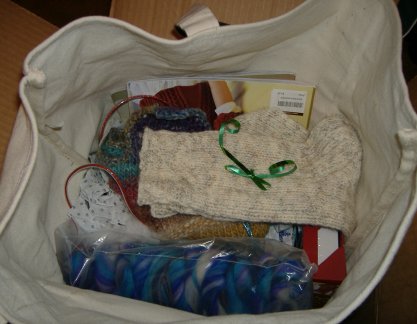
Inside that, there were  …
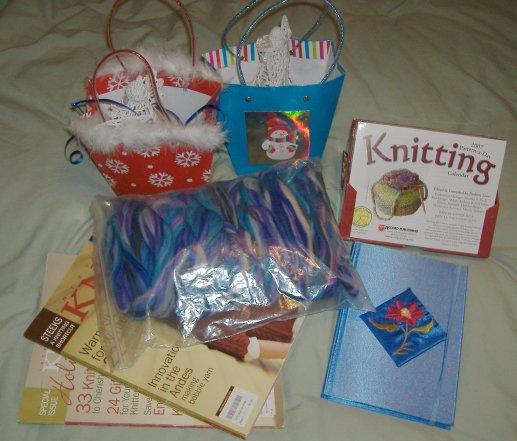
… two small gift bags, a knitting calendar (a pattern a day, I think), the two latest issues of Interweave Knits, a hardback notebook with an embroidered flower on the front (not as shiny as the flash makes it seem) and a bag of gorgeous wool roving.
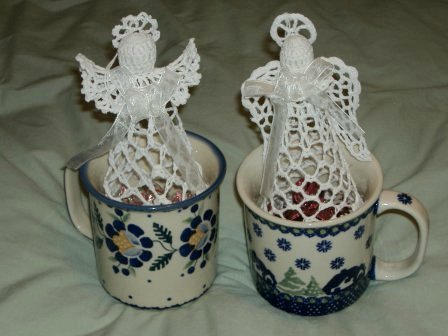
In each gift bag, there was a Polish mug [my SS and my DH share a Polish background] with some Hershey Kisses in it topped by an angel ornament
But the best of all were …
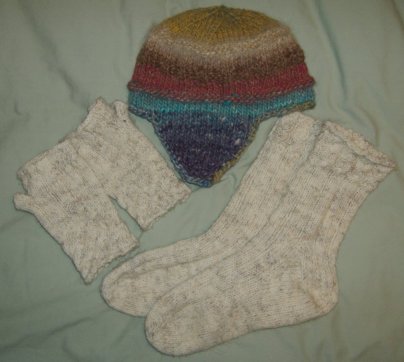
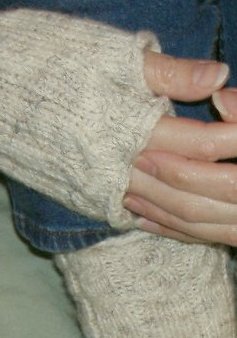
… warm socks with cabled cuffs, matching fingerless mitts and an earflap style hat in Noro, which fits very well.
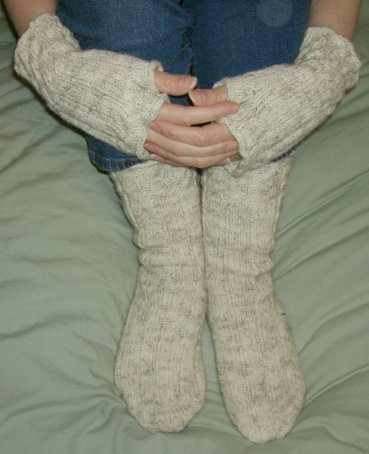
I tried to get a picture of the cable detail, but it still doesn’t show well.
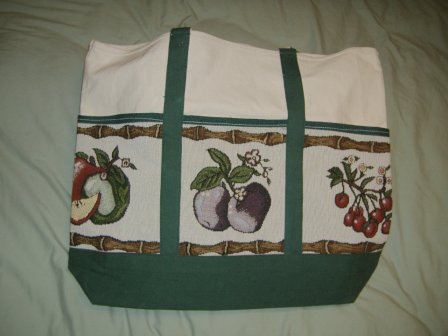
Last but certainly not least, the tote bag itself, which is enormous, with 3 huge pockets on the front – very useful in a tote bag for crafters.
Didn’t Nancy … I mean Secret Santa … do well? She really spoiled me!
Well, Sivia Harding has renamed her design Angel Pearls, but I prefer the original name, which is what it says on my copy as I have had it for quite a while, waiting for the right occasion.
 I found this yarn when a supplier came to a guild meeting, and I have friends, both online and locally, who love green, so …
 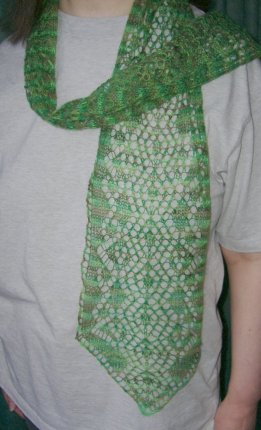
Pattern: Angel Pearls – I did 2 extra repeats of the main pattern
Yarn: handpainted 2-ply merino/mohair from Touch Yarns
Needle:Â 3.75mm bamboo circular
Blocked size: 69″ by 7.5″
Relaxed size: 64″ by 7″
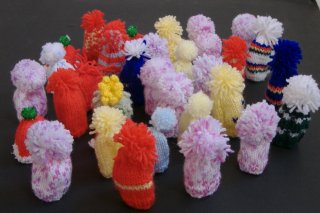
Well, I only got 11 of the little hats made myself, but with the ones I collected from guild members I was able to send off 34, and I know another member who couldn’t get hers to me in time has sent another 11 direct to Innocent.
I decided to try some long-repeat dyeing for socks for a friend, and here it is ….
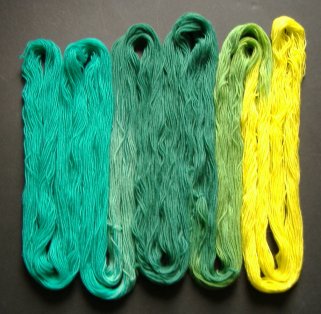
Bright, isn’t it?  Not my colours but I hope she will like it.
In case someone is curious as to how I did it, I wound the yarn into a long skein on my warping board (5 yard path, so 10 yard repeat), then dip dyed it. Here is a picture of it in the first colour bath …

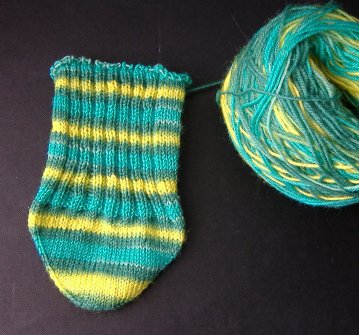
So, how did the stripes work out?  Well, like this …
I have been remiss about blogging again. I haven’t had much time for fibre crafts this past month, and what time I have had has mostly been spent knitting plain dark navy anklets for my mother, which wouldn’t make for very interesting pictures.
I did start the Icarus shawl I’ve been longing to knit, but the begininning of it isn’t very photogenic either. For anyone who is curious, I am using dark teal 2/14 cashmere yarn from ColourmartUK. The Icarus is on hold for a while (sob) because as well as my mother’s anklets I have also started on holiday gifts.
However, I do have a picture of a knitting project … a rather silly little hat, 3″ tall including the bobble, 1.75″ without it. It’s a scan, not a photo, so the bobble is rather squashed.
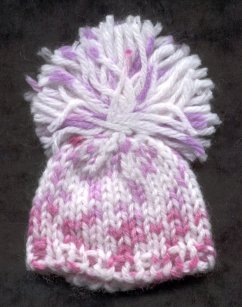
A UK smoothie company has a charity project each winter. It is donating money for every bottle with a little hat on it which is sold in some supermarkets in the month leading up to Christmas, and it needs knitters to provide them. I mentioned it at my guild, so now some of us are knitting them when we have a few spare minutes. One member has even got her work colleagues making them in their lunch breaks. I’ve only made the one in the picture so far, but I’m aiming for at least a dozen. They are quick to make, and it’s such a great cause.
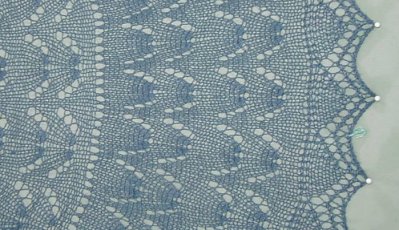
Many, many moons ago, a group of friends who met regularly on IRC decided to have a scarf/shawl exchange. Opal and I drew each other. Opal decided to tackle the Fan-Stitch Half-Circle shawl from Waterman’s Traditional Knitted Lace Shawls, which was an ambitious project for her then. She is a much more experienced lace knitter now, as you can see from the lovely shawls she has completed recently. Anyway, back then it was a challenge for her, but it was going well until one of her cats decided to … um … water it. Although Opal washed the yarn and the work-so-far, it dampened her enthusiasm and the WIP became a UFO.
Time passed and she worked on it now and then, but eventually I thought she deserved to be rescued from it, so I offered to finish it. Well, I was just as slow, as other projects with deadlines kept getting in the way. I decided I needed an incentive, so I told myself I couldn’t start any other lace project till this one was finished. I cheated by doing the Mystery Stole 2 because I wanted to do it as the clues came out, while it was still a mystery, but I wouldn’t let myself start the Icarus shawl till I finished the fan stitch one. At last, it is done!!!  As usual, click for bigger versions …
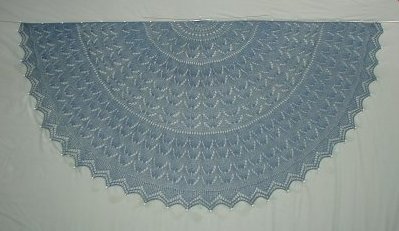
Pattern:Â Fan-Stitch Half-Circle shawl – Vandyke edging added
Source: Waterman’s Traditional Knitted Lace Shawls
Yarn:Â a mystery, but it is similar to Jaggerspun Zephyr – 54g, or just under 2Â ounces
Needle:Â 3mm
Blocked size: 44″ by 22″. but I expect it to shrink a little when it relaxes.
It has turned out to be a shoulder shawl, just reaching my elbows and just below my waist at the back. My mother mentioned a couple of months ago that she would like a small shawl to use as a ‘bed jacket’, so this one wlll be going to live with her this weekend. This is good timing as she is in pain from polymyalgia in her shoulders, and needs a little extra warmth around her shoulders without a lot of weight.
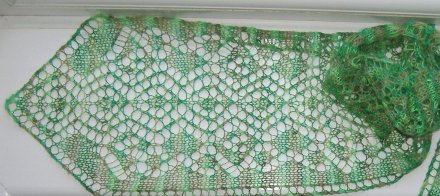
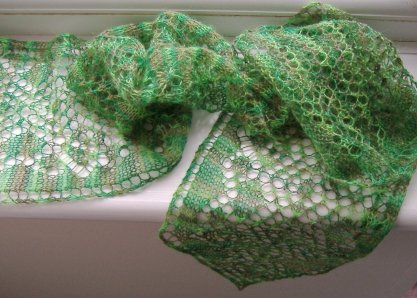
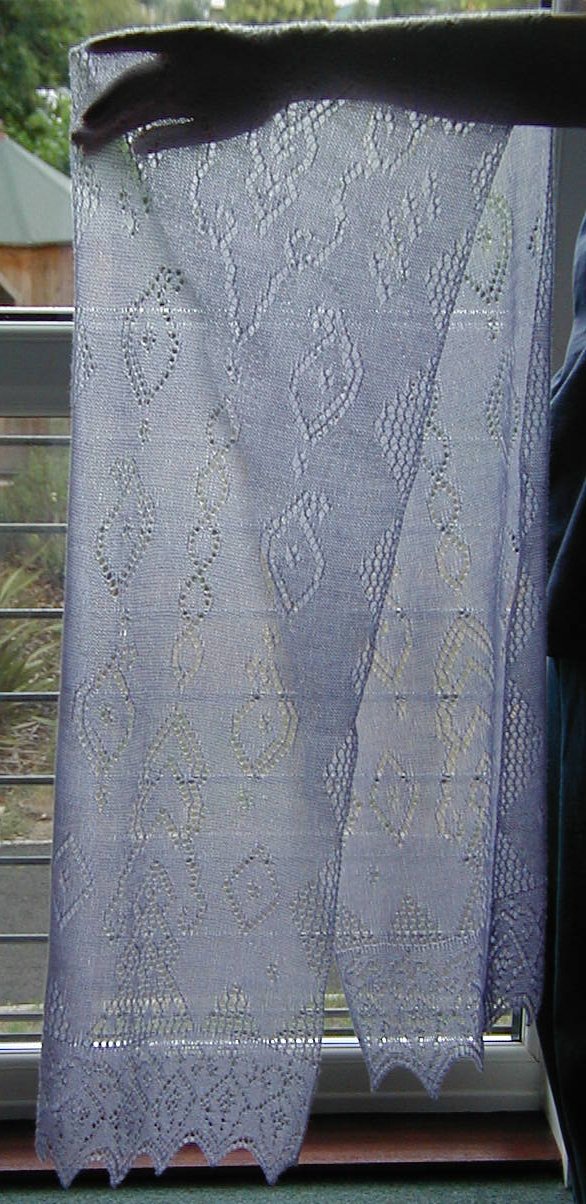
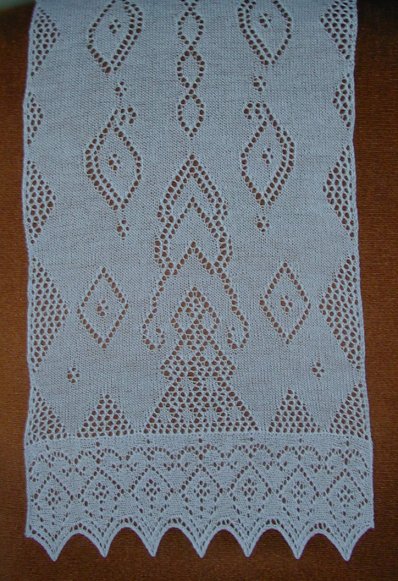
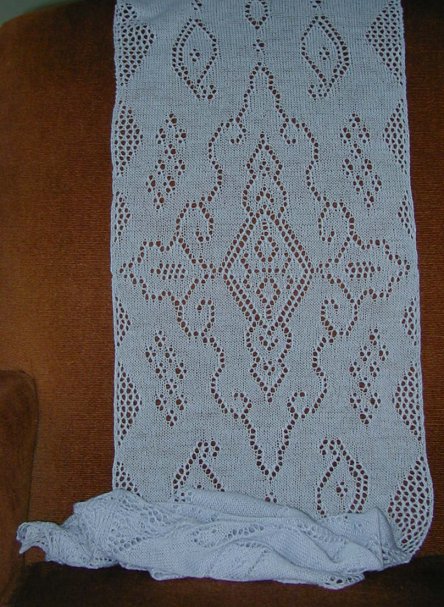
“What”, you may be asking, “is Scheherazade?” It is the official name of the Mystery Stole 2006, and a very appropriate one too.. I finished it on Friday, but I couldn’t block it till Saturday, and then this site was down, so I’m a little late blogging it. I’m very pleased with it. Although the close-up pics still make it look quite solid, it is actually fine and floaty and airy.
Scheherazade was designed by Melanie Gibbons. I knit mine in Skacel Merino Lace (6120 ypp), which I would call nearer cobweb than laceweight. It took 810 yds (60g, 2.12 oz) using 2.75mm (US #2) needles.
Melanie predicted that the finished size when knit in Zephyr laceweight on #3 needles would be about 20″ by 72″. I knew mine would be smaller, so I planned to block it as a scarf, keeping most of the length but letting it be narrower. Before blocking, it was only 13.5-14″ by 56-60″, but I blocked it to 14.5-15″ x 79″. After unpinning, it has shrunk back to 13″ by 71″, which I think is a good size for this type of scarf, and I doubt that it will shrink more now.
I’m including a shot of it before blocking, just because I’m always surprised by just how much difference blocking makes. The first two pictures give the most accurate colour on my monitor, though they are a little bluer than the real thing.
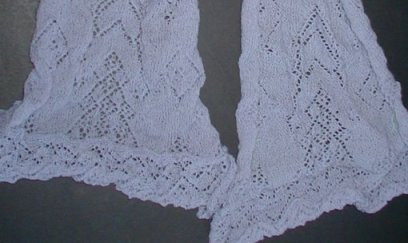
The last clue came out yesterday, and I’m hoping to be able to put up a picture of the first half in a couple of days. Meanwhile, there have been some doubts raised about knitting the edging straight onto the last pattern row, as given in the pattern. I decided to knit a swatch rather than risk needing to frog the edging on the actual stole:
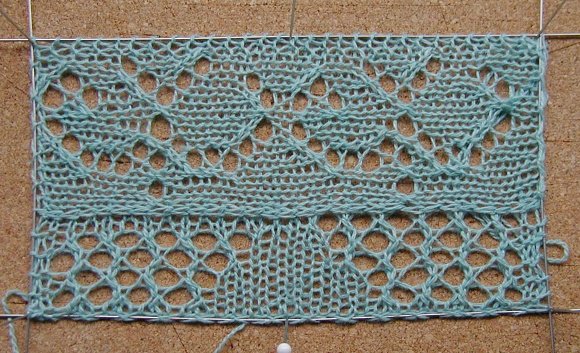
Click on the picture above to get a close-up shot.
I only swatched the last few rows of a section of the body (bottom of picture) and a few stitches from the ‘inside’ part of the edging. The full edging is going to be beautiful! The swatch is dry-blocked.
The right half of the swatch is done as given in the pattern, the left half has two extra plain rows in the body before starting the edging. I prefer the pattern version. I do have some doubts about the start and end of the edging, though, which I will raise in the discussion group.
-
Failed to fetch badge info from Flickr.\n
-

-

-
